Chicken Cannelloni with Panzanella Salad
This is one of my new favorite dinners, it’s so easy, and it is absolutely delicious! It’s also really fun to make…you get to use your hands, which always makes me feel like I’m a little kid playing with my food. Plus, there are so many bright, robust flavors in this show-stopper stuffed pasta, and the cool salad on the side is a nice change-up to the traditional garden salad. I promise that you’ll love it!
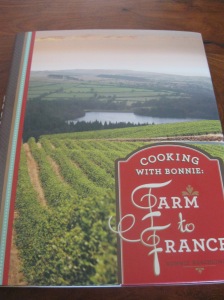
We received this cookbook from some friends of my dad’s as a thank you present, and I have to say that I absolutely love it! It’s Bonnie Aeschliman’s Cooking with Bonnie: Farm to France, and it is full of fresh, healthy, incredible food. This recipe is actually from this book as well as the salad.
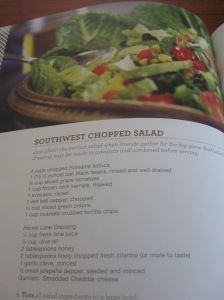
This salad is SO SO good!
And doesn’t this look heavenly!? Ahh, I cannot not wait to try out every recipe in this book! I definitely recommend it to everybody, but let’s get back to the main dish now!
Chicken Cannelloni with Panzenella Salad (Farm to France)
Chicken Cannelloni:
- 2 tbsp. olive oil
- 2 cloves garlic, minced (optional)
- 1/2 an onion, chopped
- 1 red bell pepper, chopped
- 2 stalks of celery, chopped
- 1 15 oz. carton of ricotta cheese
- 1 egg, slightly beaten
- 8 oz. shredded Mont. Jack cheese
- 3 green onions, chopped
- 1/2 c parmesan cheese
- 2 tsp. dried basil or 3 tbsp. fresh basil
- 1/2 tsp. oregano or 2 tsp. fresh oregano
- salt and pepper
- 1 pound cooked chicken breast
- 12 to 16 manicotti shells, cooked and drained
- 6 tbsp. butter
- 6 tbsp. flour
- 2 1/4 c milk
- 1 1/2 c chicken broth
- salt and red pepper flakes
- 1/2 c parmesan cheese
- 3 c mozzarella cheese
Panzanella Salad
- 1/4 c olive oil
- 1 tbsp. minced garlic (optional)
- 6 cups of crusty bread cut into 1 1/2 inch cubes
- 6 tbsp. parmesan cheese
- salt and pepper
- 2 pounds ripe tomatoes
- 2 cucumbers, peeled and sliced
- 1 yellow or orange bell pepper
- 2 c chopped romaine lettuce
- sliced onion (optional)
- 2 tbsp. chopped basil
- 2 tbsp. chopped parsley
- salt and pepper
- 2 tbsp. minced garlic
- 1/2 c olive oil
- 2 tbsp. white wine vinegar
For the cannelloni: Saute the garlic, onion, red pepper, celery, and green onions in the olive oil until tender. Combine it with the ricotta, egg, Monterey jack cheese, parmesan cheese, basil, oregano, salt and pepper, and chicken in a large mixing bowl. Then melt the butter in a saucepan and stir in the flour. Cook until bubbly. Add milk, chicken broth, salt, and red pepper flakes. Cook, stirring constantly, until sauce boils and is thickened. Stir in the remaining parmesan cheese off the heat. Preheat the oven to 375 degrees, and spread a thin layer of parmesan sauce over the bottom of 2 13×9 pans. Split each cooked pasta tube in half and place about a 1/3 c of filling along the pasta. Roll it up to enclose and place seam-side down in the pans. Pour the remaining parmesan sauce over the cannelloni and cover with mozzarella cheese. BAke for 30 minutes, or until bubbly and golden. Serve with marinara sauce. Makes 16 servings.
For the salad: Preheat the oven to 375 degrees and combine the olive oil with the garlic. Heat it for 15 seconds in a microwave safe glass just to infuse the olive oil. Pour this over the bread cubes, along with the salt and pepper, and cheese. Bake them on a baking sheet, stirring once or twice, for 8-9 minutes. Let cool and store in an airtight container. Combine tomatoes, cucumbers, pepper, romaine, onion, basil, and parsley. Add the croutons and toss well. Combine the garlic, olive oil, and vinegar and drizzle over the salad. Toss to coat.
Be sure to follow me on instagram-cookingwithkatie and Pinterest-cookwithkatie
BTW, this is not a paid advertisement. This is just a great cook book that I thought you all would enjoy!
Steak with Mushroom Gorgonzola Sauce
I can’t believe the holidays are already over, they flew by! I really enjoyed spending time with my family and eating lots of good food, and I hope that you all enjoyed the holiday season as well. If you’re like me, though, and you’re a little disappointed that it’s all over, then this is the perfect dish to make! Steak always keeps me in a festive mood, and when it’s smothered in a luxurious, sinfully-delicious mushroom gorgonzola sauce, it’s just like Christmas dinner. Make it tonight, so that you don’t have to choke down more left over ham and turkey. I promise, you won’t be able to resist this tangy, creamy dinner!
Meat:
- 2 T olive oil
- 3 cloves garlic, minced (optional)
- 1 beef tenderloin, or any other steaks you like
- salt and pepper
- thyme
- basil
- rosemary
- 1 c red wine
Preheat oven to 375 degrees. Combine oil with garlic. Rub the surface of the beef with this mixture and then season with salt and pepper. Chop up the herbs, using different amounts depending on your taste, and sprinkle them on the meat. Place in a roasting pan and pour in half of the wine. Roast for 40-60 minutes, pouring the remaining wine over the meat halfway through the cooking process.
Mushroom Gorgonzola Sauce:
- 1/2 c butter
- 1/2 pound mushrooms, sliced
- 3-4 green onions, chopped
- 2 cloves garlic
- 4 ounces gorgonzola cheese
- 1 T Worcestershire sauce
In a medium skillet, melt the butter and then add the mushrooms and green onions. Cook until the mushrooms are soft, and then add the gorgonzola cheese and Worcestershire sauce. Serve over the beef. Enjoy!
Sauce serves 8-10 portions
Cranberry Orange Scones
 I know what most of you are thinking, Ew, scones, aren’ those basically the equivalent of rocks!? And most of the time, yes, scones are the equivalent of rocks. Whenever I’ve had them at restaurants or bought them from stores they’ve always been dry and crunchy and flavorless and…yuck, so it was a complete shock when I made these and they came out so heavenly!
I think that the secret to scones is to add pleanty of liquid so that you have a really wet dough, and to pull them out of the oven even when you think they aren’t done, because if you wait, you’ll most likely overbake them. And once you master a scone recipe, you can completely switch up all the flavors and add different fruits or nuts or whatever you want. These are a great addition to your breakfast or brunch table and are sure to impress whoever you serve them to!
Cranberry Orange Scones (based on Ina Garten’s recipe)
4 cups plus 1/4 cup all-purpose flour
1/2 cup sugar, plus additional for sprinkling
2 tablespoons baking powder
1 teaspoon kosher salt
1 tablespoon grated orange zest
3/4 pound cold unsalted butter, diced
4 extra-large eggs, lightly beaten
1 cup cold heavy cream
1 cup dried cranberries
1 egg beaten with 2 tablespoons water or milk, for egg wash
1/2 cup confectioners’ sugar, plus 2 tablespoons
4 teaspoons freshly squeezed orange juice
Preheat the oven to 400 degrees F.
In the bowl of an electric mixer fitted with a paddle attachment, mix 4 cups of flour, 1/2 cup sugar, the baking powder, salt and orange zest. Add the cold butter and mix at the lowest speed until the butter is the size of peas. Combine the eggs and heavy cream and, with the mixer on low speed, slowly pour into the flour and butter mixture. Mix until just blended. The dough will look lumpy! Combine the dried cranberries and 1/4 cup of flour, add to the dough, and mix on low speed until blended.
Dump the dough onto a well-floured surface and knead it into a ball. Flour your hands and cut the dough in half, then roll it out in a log-shape, one half at a time. Take a knife and cut triangles out of the log, alternating cutting a left diagnol, then a right diagnol. Put the scones onto a cookie sheet lined with parchment paper.
Brush the tops of the scones with egg wash, sprinkle with sugar, and bake for 20 to 25 minutes, until the tops are browned and the insides are fully baked. The scones will be firm to the touch. Allow the scones to cool for 15 minutes and then whisk together the confectioners’ sugar and orange juice, and drizzle over the scones.
Mini Lemon Meringue Pies
 I know I haven’t posted in a while, but now that I’m back in school, I have been so incredibly busy with homework, drill team practices, and school events that I’ve barely had time to cook! I’m finally on Thanksgiving break, though, and I want to post some recipes that may be fun alternatives to the classic Thanksgiving dishes. Like these little pies; they’re a perfect alternative to pumpkin or pecan pie. And don’t be fooled by their stereotype, these are NOT just for summertime! They make a refreshing, delicious little treat anytime of year, especially on your holiday table. Plus, what relative won’t be impressed by mini pies!?
Mini Lemon Meringue Pies (Pie Crust recipe by Paula Dean, Lemon Curd recipe by Anne Burrell)
Pie Crust:
- 1 (3-ounce) package cream cheese, softened
- 1/2 cup butter or margarine, softened
- 1 1/2 cups all-purpose flour
- 1/4 teaspoon salt
Lemon curd:
See the recipe on one of my past posts.
Meringue:
- 2 egg whites
- 1/4 c sugar
- 1/2 tsp. cream of tartar
- 1/2 tsp. salt
Preheat the oven to 350 degrees. Place all of the crust ingredients in a food processor and pulse until the mixture forms a ball. Wrap in plastic wrap and chill until firm, about 1 hour. Form the pastry into 24 small balls; press with fingers into the bottom and up the sides of ungreased miniature muffin tins. Bake for 20 minutes, until lightly browned.
Preheat the oven to 300 degrees F. In a bowl, combine the lemon juice, zest, sugar, eggs and salt and whisk to a homogeneous consistency. Place in saucepan and bring to a medium heat. Cook, whisking, constantly until the mixture has thickened, about 12 to 15 minutes. Remove from heat and whisk in the butter, 2 pats at a time until it’s incorporated and has a silky consistency.
Pour the lemon curd into the pie shells and bake for 10-15 minutes or until it’s set. Let them cool.
Whisk the egg whites with the salt and cream of tartar in an electric mixer until they’re frothy. On the lowest speed, slowly add in the sugar a couple tablespoons at a time until the egg whites are thick, shiny, and stiff. Put the meringue in a pastry bag and pipe it onto the pies. Put the pies under the broiler until the meringue is browned and toasty. Happy Holidays!
Everything but the Kitchen Sink Quiche
 This quiche is one of the most flavorful, ecclectic dishes I’ve ever made and it is SO great to make when you’re cleaning out your pantry/fridge! I call it “Everything but the Kitchen Sink” Quiche because it really does have everything but the kitchen sink in it. All the ingredients work so well together, though, and there’s so many that everyone is bound to find something that they like. But for all you picky palates, you can change up the ingredients however you want! You can use different cheeses, veggies, whatever’s about to go bad in your fridge…you get the idea!
- 4-5 slices of bacon, cut into little pieces
- 1 yellow onion, diced
- 1-2 c mushrooms
- 1/4 c diced sundried tomatoes
- 1 little can of diced green chilies
- 3-4 handfuls of fresh spinach, stems removed
- 6 eggs
- 1/2 c half-n-half
- 1/2 c grated swiss cheese
- 1/2 c grated gouda cheese
- salt and pepper
- 2 deep dish pie crusts
Cook the bacon in a skillet until it’s crispy, then set aside. Add the onions and cook until soft.
 Chop up the sundried tomatoes…
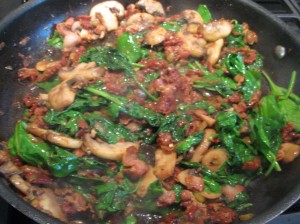 Then throw it all in the saucepan along with the mushrooms and some salt and pepper. Let everything cook and then add the bacon back in.
Mix together the eggs, half-n-half, and cheeses and then add the vegetables.
Pour it all in your prepared pie crusts and bake it 375 degrees for about 30 minutes or until it doesn’t jiggle anymore. Enjoy!
Makes 2 quiches.
Peach Blueberry Crumb Pie
 Okay, so this is defiantely not the prettiest picture I’ve ever posted, but it shows you every great componet of this pie. The crispy crumb topping, juicy peaches and blueberries, and flaky crust make this so irresistable, and it’s a huge crowd pleaser! It’s the perfect dish to have at a summer barbeque or pot-luck, and kids love it! I loved how great it was for summer time and how easy it was to throw together, and I’m sure that you’ll love it too!
Peach Blueberry Crumb Pie (Giada de Laurentiis)
Filling:
- 1/4 cup quick cooking tapioca pearls, such as Minute Tapioca
- 1 pound frozen blueberries, thawed and drained, or 1 1/2 cups fresh blueberries
- 1 pound frozen peaches, thawed, or 3 large fresh peaches, pitted and thinly sliced
- 1/2 cup brown sugar
- 2 tablespoons fresh lemon juice
- 2 teaspoons pure vanilla extract
- 1 1/2 teaspoons ground cinnamon
- Zest of 1 large lemon
- One 9-inch unroll-and-bake refrigerated pie crust
- 1 egg white, lightly beaten
Topping:
- 1/2 cup (1 stick) butter, cut into 1/2-inch pieces, chilled
- 1/2 cup quick cook oats
- 1/2 cup almond flour
- 1/2 cup brown sugar
- 1/2 cup slivered almonds
Place an oven rack in the center of the oven and preheat to 375 degrees F. Butter a 9-inch ceramic or glass pie dish.
For the filling: Finely grind the tapioca in a food processor or spice grinder, about 1 minute. Combine the blueberries, peaches, sugar, lemon juice, vanilla, cinnamon, lemon zest and tapioca in a medium bowl.
Unroll the pie crust and place in the pie dish. Brush the inside with the egg white.
For the topping: Pulse the almonds, butter, oats, flour and sugar until small chunks form in a food processor.
Pour the filling into the crust. Crumble the topping over the filling and bake until the top is golden brown, about 55 minutes. If after 30 minutes of baking the edges of the crust begin to brown too quickly, cover the edges of the pie dish with strips of foil. Cool the pie for 30 to 40 minutes before slicing.
A Fish Tail
My family and I just got back from our family vacation in Georgia and it was so much fun!!! We stayed in a beautiful cabin in the Smoky Mountains and spent most of our time outside. My siblings and I are a couple of wimpy city kids, though, and this was our first time getting to experience the outdoors in this way. We had a beautiful stream in our backyard and lots of trees and greenery everywhere, and we really enjoyed going hiking and rafting and fishing.
Although my brothers were really gung-ho for all the outdoorsy stuff, my sister and I were still pretty unsure about the whole thing, but fishing was one activity that we both really enjoyed. We’re used to fishing in a lake for little feeder fish like sunnys or croakers, but fishing in an actual river for trout was so different and so much more exciting! It was so fun that my brothers and I decided to go out one evening and catch trout for dinner. It was such a great experience, and now, I’m going to share what I learned with you guys!
 These are my brothers, Asher and Adin. I think they’re baiting their hooks in this picture…and making plans to try to push each other in the water. You know, guy stuff.
We used a couple different kinds of bait. We started off with salmon eggs, but they were too easy for the fish to just nip off the hooks. So then we tried live crickets but, once again, they were too easy for the fish to just bite off. We ended up just using good ol’ worms, and they worked the best.
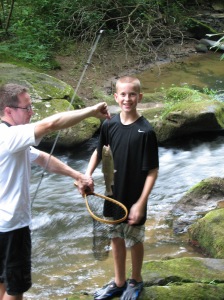 Asher was the first one to catch a trout and he actually went on to catch 2 more, too. He was so happy to catch his first trout and we were all really proud of him.
A quick note about my dad: He wasn’t really posing for the camera in any of the pictures so…just know that. 😉
 Yay!!! I finally caught one!!! It was such a great feeling to tame a wild fish!…well, maybe I didn’t really tame it, and…I guess it wasn’t really a “wild” fish. But you get the idea.
I think my dad’s saying, “Geez girl, don’t whack me with the pole!”
Isn’t great how daughters can know exactly what their fathers are thinking just by looking at their faces!?
 I would now like to point out that I did catch the biggest fish of the trip. It was 12 inches long! 🙂
 Now that the hard part was done, it was time for the gross part. Cleaning and gutting the fish. I’ll save you the horror and not post any detailed pictures.
You’re welcome.
 My dad grew up in Colorado and served in the army. This was where his Rocky Mountain and military experience really came in handy. Trout don’t have scales, so all we had to do was cut them open and take out the nasty stuff. My brother decided he wanted a front row seat to learn how it was done, but I decided to just sit back and watch. In this picture, I was thinking, “Oh..my..what is that!?”
Please excuse Adin, I don’t know where his shirt went. It was probably stolen by a bear.
Hey look, a belly button!!!
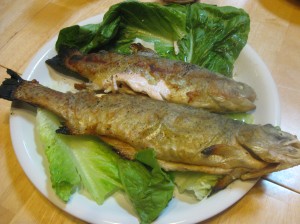
 Now that the fish were clean, it was time to cook them! We dusted them with flour, paprika, salt, and pepper and threw them in a screaming hot pan. The skin got super crispy and the meat just fell away from the bones, it was delicious!
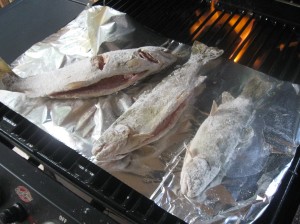 We also put a couple on a piece of oiled aluminum foil on the grill.
As you can see, the skin didn’t get quite as crispy, but the grill did give them a really great smoky flavor.
So now it’s your turn! Go out, try something new, and tell me about your adventures! I’d love to hear!
Black Bean Salsa
 Summer is finally here, and, if you live in Texas too, then you know how hot it already is! I wish the heat would just wait a little while, and not bombard us right at the beginning of June! Oh well, I guess I just have to sit around in the AC and pray for December to come, when it gets somewhat cooler! *sniffle*
At least I’ll have this salsa to suffer through the high temperatures with me! It’s so cool and refreshing and it’s stocked full of healthy summer veggies! Corn, tomatoes, and avocados make this salsa irresistible and it’s a great crowd pleaser at barbeques and cook-outs. I hope it helps you beat the heat!
Black Bean Salsa
- 1 can black beans, drained and rinsed
- 2 ears corn, shucked
- 1 lb. grape tomatoes
- 2 avocados
- cilantro, chopped
- 1 jalapeno, chopped
- 2 limes, juiced
- salt and pepper
Put the corn in a pot of boiling water and let it cook for about 3-5 minutes. Cut the kernels off the cob and put them in a bowl with the black beans. Cut the tomatoes into bite-size pieces and do the same with the avocados. Add them, the lime juice, salt and pepper, chopped jalapeno, and chopped cilantro to the bowl and stir it together. Put it in the fridge for at least a half hour to let it sit and develop flavor, and then serve it with corn chips.
Gardening Tips: Planting Potatoes
In our garden this year, we decided to try something new and kinda different; we planted potatoes! They are super low-maintenance, and they’re fun for kids to help with. My brothers got a kick out of seeing the “eyes” on the potatoes turn into plants!
 Start by taking some old, gross, nasty, horrible-smelling, rotten potatoes that have grown eyes and roots and everything and cut them into chunks. They need some eyes, roots, and potato flesh on each chunk.
 Then dig a hole about 6-8 inches deep and place the potato in it.
 Cover it with dirt and give it plenty of water for the first few weeks. The first sprouts should start popping up within 1-2 weeks of planting the potatoes. The sprouts will have thick stems and hearty, dark green leaves on them when they first pop up. Do NOT mistake them for weeds! 😉
 These are the plants right now. We’ll dig up the potatoes in the fall, and I can’t wait to see if they worked! Have fun!
Florentine Chicken Pasta
 This is the first blog post I’ve written in over two months, and I have to say that I can’t believe it’s been this long!!!! I’ve been so busy with school, dance competitions, drill team, babysitting, play performances, and a million other things that I haven’t had time to cook! But, now that summer is finally here, I’ll be cooking and posting a lot more often!!!! And what better dish to start back again with than this yummy summer pasta!?! It’s so light and healthy that you won’t feel guilty about having fourths of it, and it’s just in time to help you get back in shape for bikini season. 🙂 Made with garden fresh tomatoes, and wholesome spinach, this dish is a winner, winner, chicken pasta dinner!
Chicken Florentine Pasta (The Pioneer Woman)
- 1 pound Penne
- 4 whole Boneless, Skinless Chicken Breast
- Salt And Pepper, to taste
- 2 Tablespoons Butter
- 2 Tablespoons Olive Oil
- 4 cloves Garlic, Minced
- 3/4 cups Dry White Wine
- 3/4 cups Low-sodium Broth, More If Needed
- 1 bag Baby Spinach
- 2 cups Grape Tomatoes, Halved Lengthwise
- 4 ounces, weight Parmesan Cheese, Shaved With Vegetable Peeler
Cook pasta according to package directions in lightly salted water. Drain and set aside.
Cut chicken breasts into chunks and sprinkle on salt and pepper.
Heat butter and olive oil over high heat in a large skillet. Add chicken chunks in a single layer and do not stir for a minute or two in order to allow the chicken to brown on the first side. Turn the chicken and brown on the other side. Cook until done, then remove chicken from the skillet.
Turn heat to medium. Add garlic and quickly stir to avoid burning. After about 30 seconds, pour in wine and broth, stirring to deglaze the pan. Allow the liquid to bubble up, then continue cooking until it’s reduced by at least half (most of the surface of the liquid should be bubbling at this point.)
Turn off the heat. Add spinach, tomatoes, chicken, and cooked pasta to the skillet. Toss to combine; the spinach will wilt as you toss everything. Add plenty of Parmesan shavings and toss to combine.
Serve with extra Parmesan shavings.

